Compact Indoor Herb Planter: Step-by-Step Guide, Material Choices, Variations and Troubleshooting
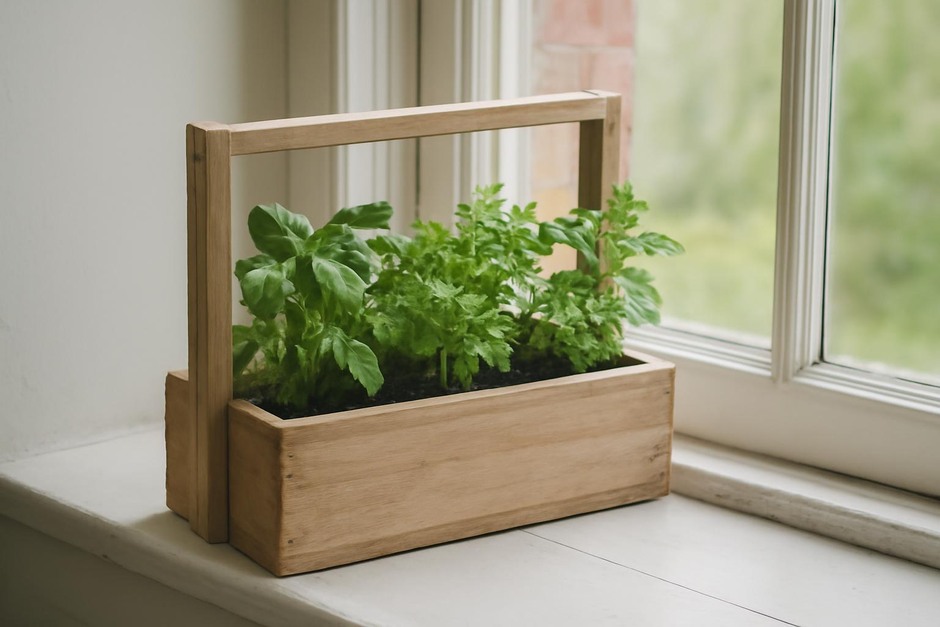
Growing herbs indoors is a practical way to add fresh flavor to cooking and green life to small spaces. This guide focuses on a compact planter you can make from common or reclaimed materials. It provides a clear step-by-step method, compares material and method trade-offs, suggests variations, and lists troubleshooting fixes for common problems.
Step-by-step method
Materials and tools (choose based on trade-offs)
- Container: small wooden planter box, terracotta trough, food-safe plastic bin, or a reclaimed wooden crate.
- Drainage: drill or hammer and nail to make holes, landscape fabric or a plastic liner for a false bottom.
- Growing medium: quality potting mix with perlite or coarse sand for drainage.
- Herbs: young plants or seeds (basil, parsley, chives, thyme, mint—mind mint’s vigor).
- Tools: drill or awl, measuring cup, hand trowel, tray or saucer, labels.
1. Choose the container and placement
- Decide the size based on your available windowsill or shelf space. A planter 8–12 inches long suits a few herbs; taller boxes allow deeper roots.
- Consider light: most culinary herbs prefer 4–6 hours of direct or bright indirect light per day. South- or west-facing windows are typical choices.
2. Prepare drainage
- If the container lacks drainage, either drill holes in the base or create a false bottom by lining it with a rigid plastic sheet and cutting small drainage slots; add a thin layer of coarse gravel if desired.
- Place a saucer or tray beneath to catch excess water.
3. Add growing medium and plant
- Fill the container with potting mix to about 1–2 inches below the rim to allow space for watering.
- Remove herbs from nursery pots, tease roots lightly if circling, and plant so the root crown sits slightly below the soil surface. For seeds, follow packet depth instructions and sow sparingly for a compact bed.
- Water gently to settle the soil and eliminate large air pockets.
4. Watering and initial care
- Water until some excess drains out (if you have drainage). Allow the top 1 inch of soil to dry slightly before the next watering for most herbs.
- Rotate the planter weekly for even light exposure and prune regularly to encourage bushy growth.
Materials and method trade-offs (neutral comparison)
- Wood: visually warm and often possible with reclaimed pieces. Pros: insulating roots, customizable. Cons: can rot without sealant; untreated wood may leach tannins—use food-safe finishes if growing edibles.
- Terracotta: breathable and attractive. Pros: good for preventing overwatering, natural look. Cons: dries quickly (requires more frequent watering), can be heavy and brittle.
- Plastic: lightweight and inexpensive. Pros: retains moisture well and often food-safe. Cons: less breathable (risk of root rot if overwatered) and less eco-friendly unless reused.
- Reclaimed materials: sustainable and characterful. Pros: unique aesthetic, reduced cost. Cons: may need cleaning, lining, or modification for drainage and safety.
- Drainage methods: drilling holes provides direct drainage but requires a tray; false bottoms reduce mess but can conceal excess moisture, increasing rot risk.
Variations
- Windowsill mixed box: Plant compact herbs like chives, thyme, and parsley in one low box for easy access.
- Vertical pocket planter: Use a fabric pocket or pocketed board for several herbs in a small vertical footprint; water distribution requires attention to top-to-bottom moisture gradients.
- Mason jar or single-pot station: Grow one herb per jar for clutter-free windowsills; ideal for decorative herbs or propagation cuttings.
- Self-watering setup: Add a simple wick from a water reservoir to the soil for drier environments; reduces watering frequency but requires initial setup and occasional cleaning.
Troubleshooting
Yellow leaves
Possible causes: overwatering, poor drainage, or nutrient deficiency. Check drainage, allow the soil to dry slightly, and consider a light feeding with a balanced houseplant fertilizer if growth is weak.
Leggy, stretched plants
Cause: insufficient light. Move the planter to a brighter location or supplement with a small grow light. Pinch back tips to encourage bushier growth.
Slow growth or compacted soil
Cause: poor-quality or compacted potting mix. Refresh the top layer with new potting mix or repot into a lighter, well-aerated medium containing perlite.
Mold or musty smells
Cause: excess moisture and poor air circulation. Reduce watering frequency, improve drainage, and increase ventilation. Remove any visible mold and replace the top layer of soil if persistent.
Pests (aphids, fungus gnats)
Address aphids by rinsing plants and using a mild soap spray; reduce overwatering to discourage fungus gnats and allow the soil surface to dry between waterings.
With considered material choices and a simple routine, a compact indoor herb planter can provide months of fresh herbs and visual interest. The best approach balances the container material, drainage method, and watering style to match your light, time, and aesthetic preferences.